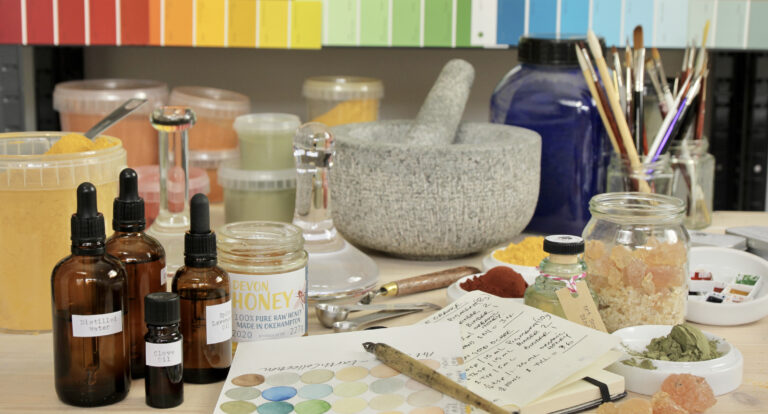

Our home studio is a small, productive space at the back of the house. In it sits a reclaimed school science bench with graffiti declaring teenage loves inside the draws. On sunny days the studio is filled with warmth and light from the large window. Various tools, equipment and creative stimuli busy the shelving from floor to ceiling. Amongst them; nesting measuring spoons, jam jars of paint brushes, a granite pestle and mortar, brown pipette bottles, piles of yellow spined National Geographic magazines and pots of coloured pigment.
But let’s focus here in on three of our essentials and favourite paint making tools that you’ll find in our studio.
A bit of a cheat to start off, but these two paint making tools go hand-in-hand and are the stars when it comes to hand mulling paint. Not least because it’s where the term ‘mulling paint’ comes from.
Mulling is the process of blending together the pigment and binder to make paint. Sandwiched between the muller and the slab, the powdered pigment is suspended within the liquid binder. Paint is made with a circular gliding motion of the muller across the slab.
Our hand held muller is a beautiful glass object which has a flat and slightly textured bottom. The one centimeter thick glass grinding slab has the same texture, making it look frosty.
This texture helps to disperse and push the pigment into the binder quickly and more evenly.
Every so often we need to re-texturise them both with silicon carbide powder. This powder is a very hard, naturally occuring mineral also used for grinding wheels and cutting tools.
Inside this little black book is the recipe and method of every colour we make. We note down the quantities and ratios of pigment and binder, how much honey to add for the perfect consistency and how long to mull on the slab.
Hand mulling our paint means we are able to get to know the different characteristics of each pigment. With our hands on and small batch approach we can finely tune the process according to the needs of the pigment. This results in strong coloured paint and workable consistency.
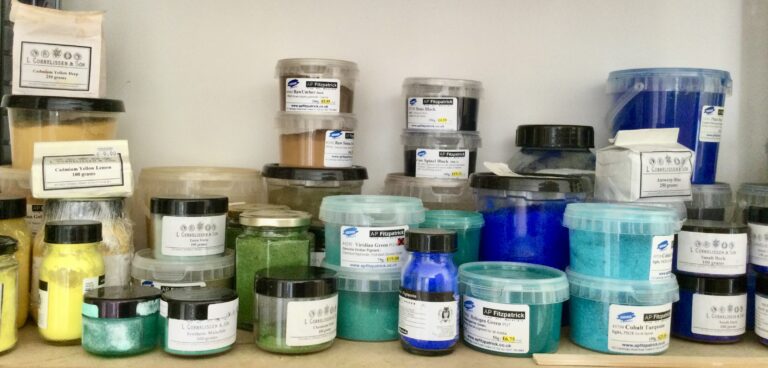
Take, for instance, the unique pigment of Blue Smalt. It is made from coloured glass particles, therefore there is a risk of losing the depth of blue colour if those particles are broken down too much through over mulling.
The water resistant nature of Heliogen Green pigment (AKA Phthalo Green) gets a special treatment before it even gets on the slab. We shake together the pigment and a little water in a jar with two marbles. This helps the water penetrate the pigment faster and makes it easier to blend in the binder on the slab.
On the other hand the oxide colours: Chromium green, Red Iron Oxide, Yellow Iron Oxide are a dream to mull. These pigments seem to take in and absorb the binder with relish.
All those nuances between pigments are noted in the book because consistency in the paint is vital.
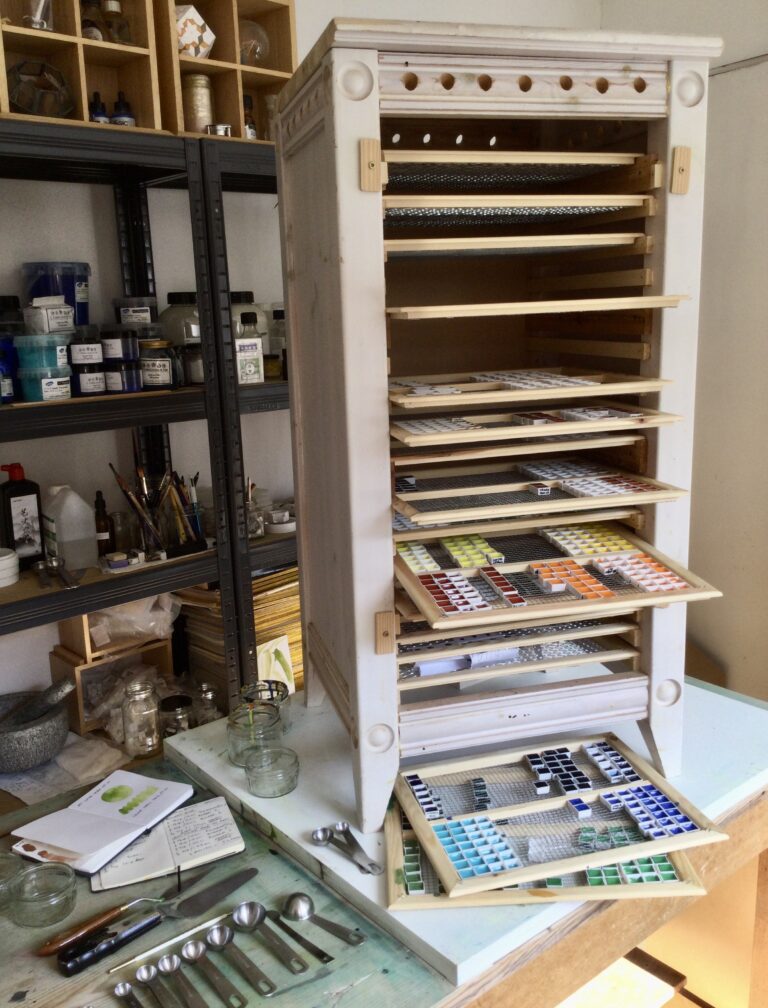
This quirky looking drying cabinet has been adapted from an ikea chest of draws. It’s where the paint settles and dries in a temperature controlled, dust free environment.
Each pan contains between six and seven layers of paint with each layer being dried in the cabinet before the next is added.
Although this part of the process can slow production down, it is essential. Drying in layers ensures the paint is distributed evenly in the pan and free from any air bubbles. It also allows for the evaporation of the water content in the pan thus delivering to you as much pure colour as possible.
We still delight in opening the door and pulling out the draws to see rows of those tiny little squares of colour. And that is where they quietly sit before being hand wrapped and hand labelled ready for your paint box and creative adventures.
We hope you have enjoyed our studio insight and gained a bit more understanding about how we make our handcrafted watercolour paint.
Read more about our paintmaking journey on our About page.
How delightful to read in detail about your processes, Art Scribes! It feels rather similar to reading Ellis Peters’s descriptions of Cadfael’s wanderings in his herb garden and going into his workroom, all sorts of potions and vials lined up on shelves. I imagine he would have had a Curious Cabinet if IKEA had been just around his Medieval corner.
Now my studio clearance is mostly finished and ready for refurbishment, I hope it won’t be too long before I can take up your offer of all those lovely greens. My 76th birthday coming up, so I live in hope! Especially as I will soon have had both my cataracts done. Old age is fun and full of challenges!
Many best wishes and good luck for a fruitful and colourful making and mulling season.
With art love 💚
Mary
Thank you for your lovely reply Mary. Made us smile to hear it evoked something of the medieval herbalist within you!